|
Step Two: Create Slices
Draw
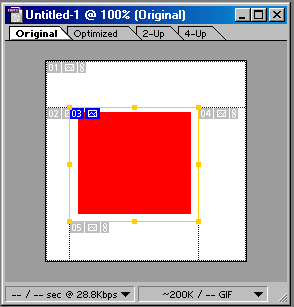
a box anywhere on the blank image. Now,
use the Slice Tool ![]() to draw a
box around your new red box. This should cause lots of stuff to appear on
your image. Each of these new rectangular regions represents a slice.
Each slice can be independently manipulated. This will be explained more
fully a little later. The image below shows our rectangle in Region 03
(the area surrounded by a yellow box). If the slice that you made is too
large or too small, click on the Slice Select Tool
to draw a
box around your new red box. This should cause lots of stuff to appear on
your image. Each of these new rectangular regions represents a slice.
Each slice can be independently manipulated. This will be explained more
fully a little later. The image below shows our rectangle in Region 03
(the area surrounded by a yellow box). If the slice that you made is too
large or too small, click on the Slice Select Tool ![]() ,
and use the yellow squares to resize it.
,
and use the yellow squares to resize it.
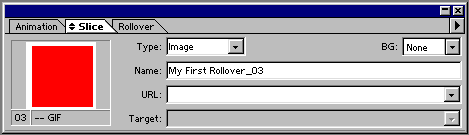
For the next step, we will need the Slice Window. Click on the Window menu, and select Show Slice (near the bottom) to display the Slice Window.
New
rectangular regions:
Slice
Window